deCONZ to Zigbee2MQTT

For several years I've been using Phoscons' deCONZ software controller for my ConBee II. Overall, the software was stable and the controller never dropped any of the paired devices. My reason for switching came when I bought new power plugs that included power monitoring. I was able to add the devices as simple "On/Off plugs" but the power data was not showing in deCONZ or Home Assistant.
DeCONZ drawbacks
- The interface is simple but is not clear when adding different device types. Plug vs. light vs. switch
- No advanced features for polling data, such as timing
- Device naming does not change in Home Assistant when modified on deCONZ
- No OTA firmware updates for supported devices
- No raw device information for troubleshooting
Mosquitto MQTT broker
This setup requires having an MQTT broker setup. I already had this setup since it was used with my ratgdo for automating my garage door. This broker can be set up anywhere, but for ease of use, I have it installed on Home Assistant as an add-on.
It's been a while since I installed this add-on. One thing to take note is the username and password. I must have left it as default and this will use your Home Assistant login to authenticate.
Zigbee2MQTT
Depending on how your Home Assistant instance is set up, you can install this as an add-on as well. I have Home Assistant running on Proxmox and it's physically far away from most of the devices. I did however give it a try. I tried passing the USB to the VM but the Home Assistant OS for some reason never picked up the device. So instead I used an extra Raspberry Pi 3b+ I had lying around. I flashed the latest raspbian 64bit headless version (Raspberry Pi OS Lite) and installed Docker and Docker Compose.
Install from Docker Docs
# Add Docker's official GPG key:
sudo apt-get update
sudo apt-get install ca-certificates curl
sudo install -m 0755 -d /etc/apt/keyrings
sudo curl -fsSL https://download.docker.com/linux/debian/gpg -o /etc/apt/keyrings/docker.asc
sudo chmod a+r /etc/apt/keyrings/docker.asc

# Add the repository to Apt sources:
echo \
  "deb [arch=$(dpkg --print-architecture) signed-by=/etc/apt/keyrings/docker.asc] https://download.docker.com/linux/debian \
  $(. /etc/os-release && echo "$VERSION_CODENAME") stable" | \
  sudo tee /etc/apt/sources.list.d/docker.list > /dev/null
sudo apt-get update
sudo apt-get install docker-ce docker-ce-cli containerd.io docker-buildx-plugin docker-compose-pluginNext in the home directory create a folder z2m and create a file docker-compose.yaml
services:
    mqtt:
        image: eclipse-mosquitto:2.0
        restart: unless-stopped
        volumes:
            - './mosquitto-data:/mosquitto'
        ports:
            - '1883:1883'
            - '9001:9001'
        command: 'mosquitto -c /mosquitto-no-auth.conf'

    zigbee2mqtt:
        container_name: zigbee2mqtt
        restart: unless-stopped
        image: koenkk/zigbee2mqtt:1.39.1
        volumes:
            - ./zigbee2mqtt-data:/app/data
            - /run/udev:/run/udev:ro
        ports:
            - 8080:8080
        environment:
            - TZ=America/Los_Angeles
        devices:
            - /dev/ttyACM0:/dev/ttyACM0
First, we can start the containers. This will create the directories needed by the application and the configuration.yaml that we will need to edit. Until we do so, you will notice the zigbee2mqtt container will fail to start. Let's open zigbee2mqtt-data/configuration.yaml. We only want to focus on the mqtt section and add the server/username/password fields.
docker compose up -d
docker compose down
mqtt:
base_topic: zigbee2mqtt
server: mqtt://<mqtt server>:1883
user: <HA Username>
password: <HA password>docker compose up -dNow we can access the new web interface at servers IP:8080

Configuration
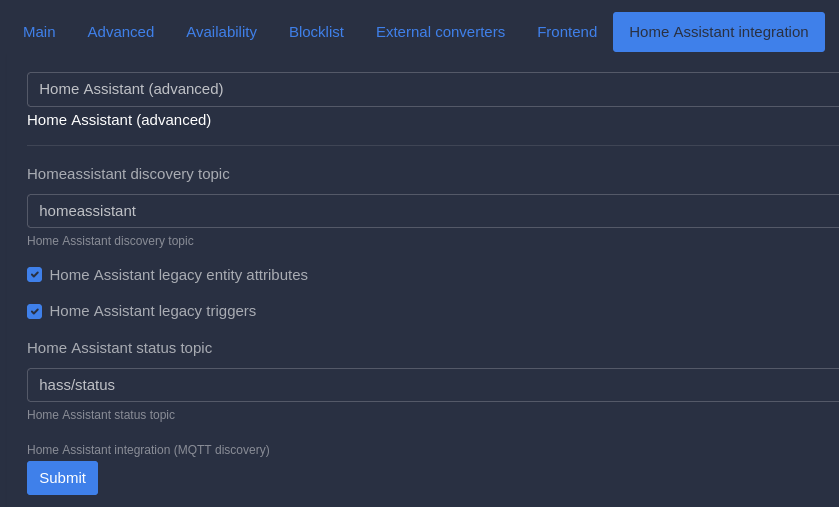
For devices to show up in Home Assistant we need to enable the option in the settings menu. Settings > Home Assistant Integration > Simple check box. This will enable another option that allows you to name devices properly, so they show up correctly.
Adding devices
Adding devices is very simple in Zigbee2MQTT. Instead of needing to guess the device type, Z2M will categorize the device while installing. Just click the join button at the top of the page and go device to device and put them in pairing mode.
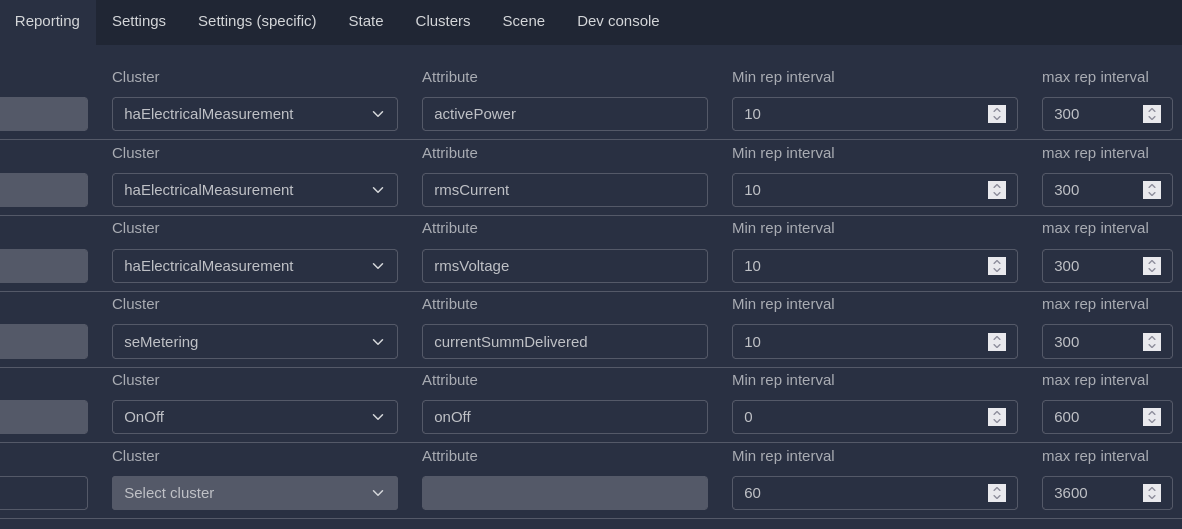
Device configuration
After you have added the devices you can fine-tune settings like polling time. This was important for me on my new power meter plugs. I found they were not updating very often so the data was lagging. This was an easy fix by going to Devices > Reporting. You can change the max rep interval to a lower number. This is measured in seconds. I changed this to 300 but may need to bump it up to 600 now that everything is reporting.